Halloween Pumpkin Carving Ideas

Light up your Halloween celebrations with an expertly-carved pumpkin – we show you how to do it!
With a little bit of time, and some great ideas to follow, pumpkin carving isn’t as tricky as it looks. From the equipment you’ll need, step-by-step instructions and even some free pumpkin carving stencils, you’ll soon have your spooky design ready for All Hallows’ Eve!
Pic: Shutterstock / New Africa

Lakeland, £4.99
Pumpkin carving equipment
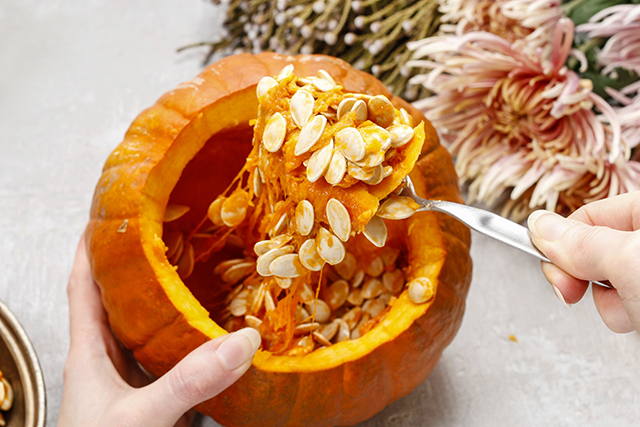
- You’ll need a pumpkin scoop for taking out the seeds and some of the flesh to give you a good base for your design. Remember you can keep the pumpkin flesh aside to use in some seasonal recipes.
- Serrated carving saw or knife – this will make short work of the tough outer skin of the pumpkin, allowing you to cut right through for the larger details of your design, and to cut the top off your pumpkin to form a lid. A smaller knife might also be helpful for finer details.
- An etching tool might be useful, for delicate details or to etch the skin of the pumpkin without cutting right through.
Kits containing all of these items are readily available in places like Lakeland, Amazon and Hobbycraft.
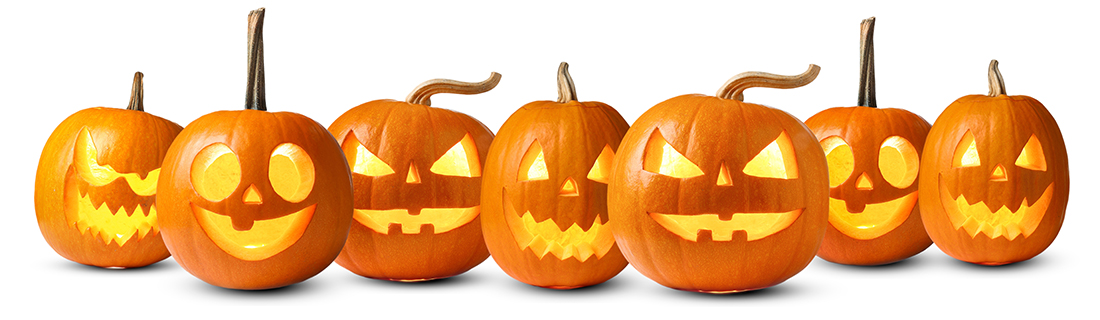
Design ideas
Easy carving ideas
When it comes to a design for your pumpkin, even the simplest ideas look great when lit up for Halloween. Take a look at the images on this page for some great ideas. Roughly sketch your design on to paper and cut out the main elements. Or if you want to be more adventurous and detailed, here are some brilliant (and free!) Halloween pumpkin stencils.
For more detailed designs, take a look on YouTube for tutorials to follow.
Halloween pumpkin carving: how to
1. Cut a lid from the top of your pumpkin. This can be a simple circle or a star-shape. Use your serrated saw or knife to carefully cut through.
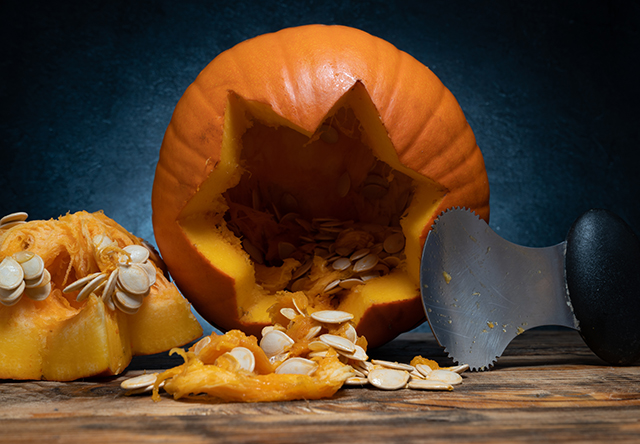
Pic: Shutterstock / Longfin Media
2. Remove the seeds and some of the flesh with your pumpkin scoop to leave a smooth finish on the inside, and pumpkin walls a few centimetres in thickness.
Pic: Shutterstock / Agnes Kantaruk
3. Arrange the paper cut-outs or stencil design on to your pumpkin and drawn round the shapes as a guide for cutting.
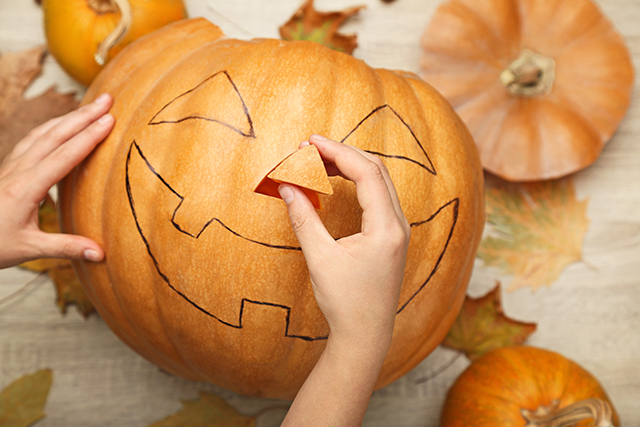
Pic: Shutterstock / 5 second Studio
Cutting out
Gently push your serrated carving saw or knife through one of the elements you want to cut out, then carefully follow your inked lines to remove the shape from the pumpkin. If you are finding it difficult to do this, you might have to scoop out more flesh from inside your lantern to make the walls of the pumpkin thinner.
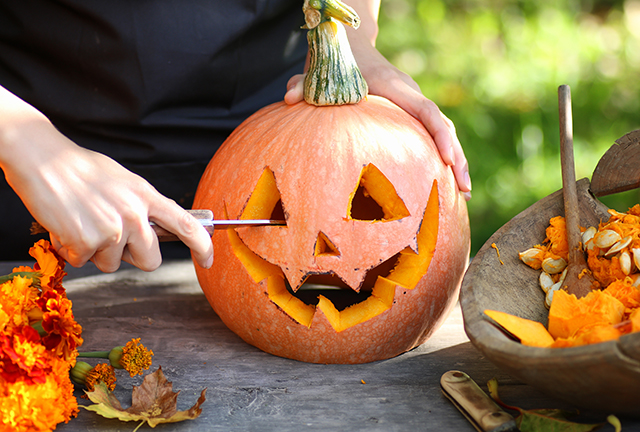
Pic: Shutterstock / alexkich
Etch on eyebrows or smaller details once all the main cutting has been done, by removing the surface skin of the pumpkin but not going right through to the inside.
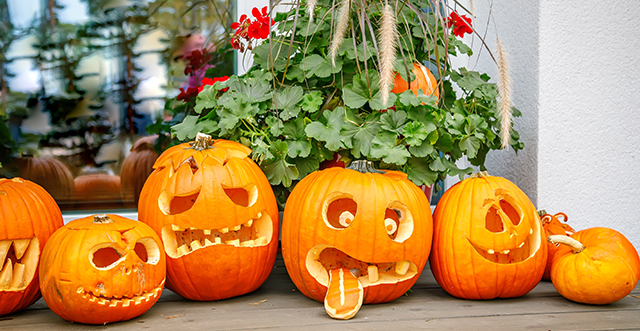
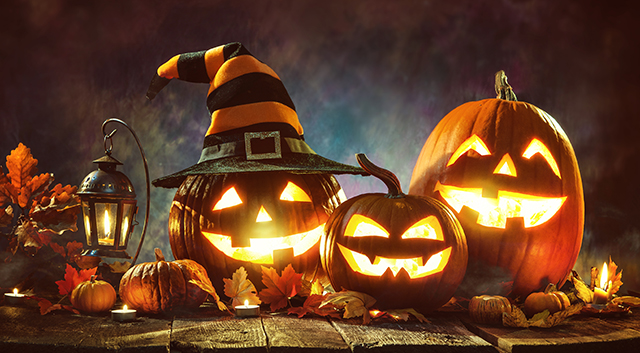
Lighting up your pumpkin – and great display tips!
Pic: Shutterstock / Alexander Raths
For safety, don’t use a candle inside your pumpkin. Instead insert a torch, battery powered fairy lights or battery operated tealights.
Consider adding other accessories like a witches hat, or group a few lanterns together for best effect! Different sized pumpkins look great together, or what about using the pumpkin stalk for a nose? Before carving, tip your pumpkin forward with the stalk in the centre front of the design. Draw the other main elements around this “nose”.
Pic: Shutterstock
How long will my carved pumpkin last?
You can expect your pumpkin to last for 2-5 days after carving, depending on the conditions that it’s stored in. Pumpkin is a fruit, and like any fruit, it starts to deteriorate as soon as it’s cut into and exposed to the air.
However, there are a few things you can do to try to extend the life of your pumpkin. Firstly, pick a top quality pumpkin to start with. Look for one that looks firm and healthy, with no blemishes or soft patches. Buy it as close to Halloween as possible.
Secondly, bring it into your home and store it somewhere cool and dark until it’s ready to carve. Make sure it is completely dry and not damp before storing it.
And finally, carve it the day before Halloween, or on October 31 itself. That way, it will still be fresh for the celebrations and you can leave it out for longer afterwards.
How can I stop my pumpkin from rotting?
There are many things you can do to make your pumpkin last a little bit longer.
When carving your pumpkin, make sure to scoop out as much of the inside as possible, removing seeds and all the moist, stringy fresh. Removing this will cut down on the moisture left inside the pumpkin – it’s this moisture that can accelerate the rotting process.
You could also try spraying the pumpkin with a mix of 1 part vinegar to 10 parts water. This can keep mould and rot at bay.
Don’t use a real candle inside your pumpkin. As well as being a safety hazzard, the heat of the candle will quickly start to rot your pumpkin. Instead opt for a battery operated tealight or fairy lights, or even a small torch.
Keep your pumpkin as cool as possible. If it’s outside on your doorstep, and the weather is cold, that’s ideal. However, if it’s sunny during the day, move your pumpkin out of the sun. You could even move it to your refrigerator during the daytime, and put it back out once the temperature drops at night time.
Find out more about the origins and traditions of Halloween.
Allison Hay
I joined the "My Weekly" team thirteen years ago and, more recently, "The People's Friend". I love the variety of topics we cover both online and in the magazines. I manage the digital content for the brands, sharing features and information on the website, social media and in our digital newsletters.